When roughness is a chore – automated Ra measurements in hard-to-reach spaces
Published on April 23, 2020
Last updated February 6, 2021
Challenging roughness measurements
Measuring roughness in hard-to-reach places is a challenge for many manufacturers. Narrow openings prevent the entry of many roughness gauges inside bores, tubes, cylinders, and other tight spaces. And yet, these surface finish measurements are often crucial to acquire, especially on parts where roughness affects part performance.
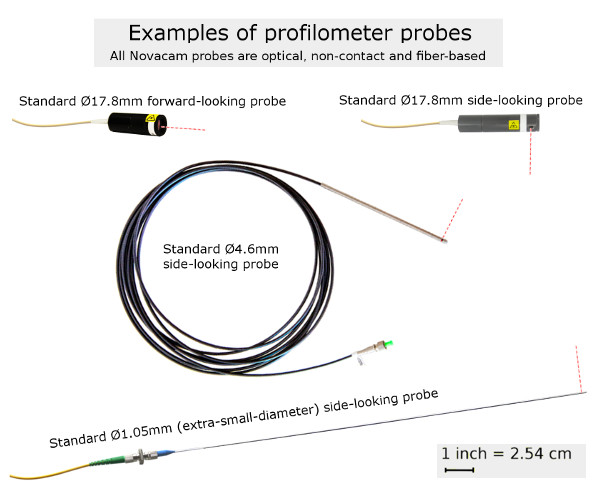
To address this challenge, Novacam designs and manufactures OPTICAL 3D PROFILOMETERTM systems that measure with small-diameter optical probes. These fiber-based probes reach inside to measure roughness (as well as 3D geometry):
- on inside diameter (ID) surfaces of bores, tubes, and cylinders
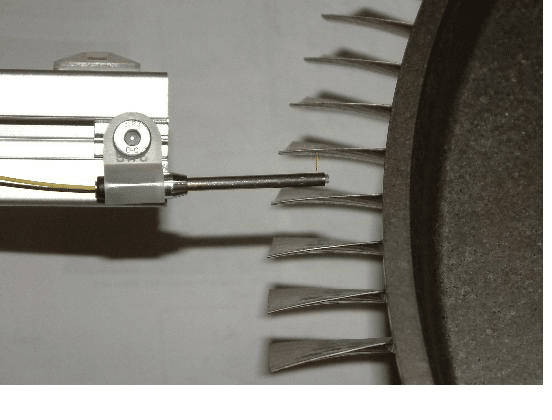
- on inside surfaces of tightly spaced blades of aerospace turbine disks
- on bottoms of blind holes, slots, or narrow channels
- and in other tight spaces where most other roughness gauges simply cannot reach.
Click on images for close-up view
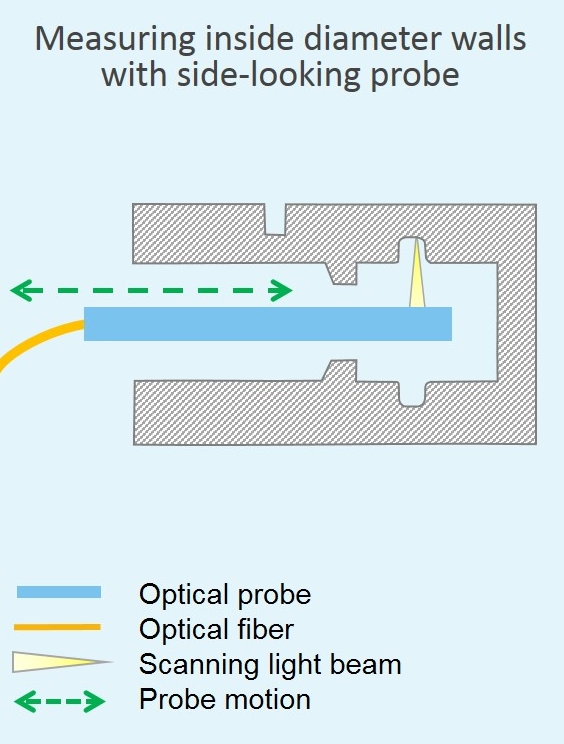
Roughness measurement on ID walls of tubes, bores and other narrow spaces
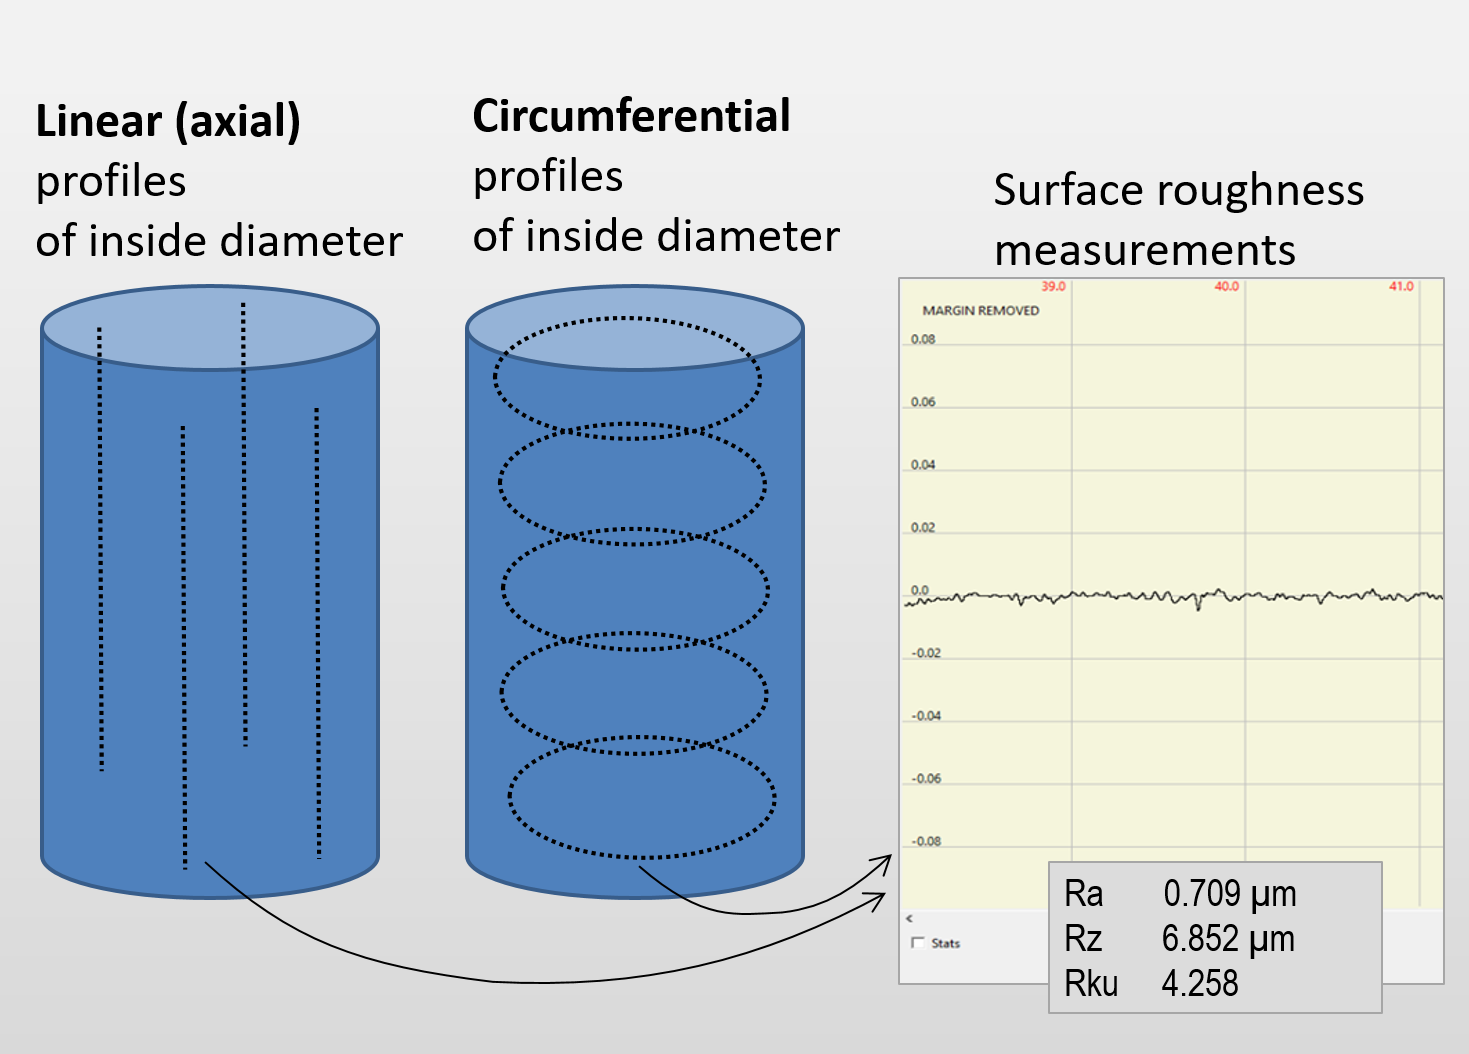
NOVACAM OPTICAL 3D PROFILOMETER system accesses inside diameters (IDs) as narrow as 1 mm with its small-diameter side-looking optical probe. The probe acquires a linear (axial) profile of the ID wall by scanning the ID surface while a linear motion stage advances it into the hard-to-reach space.
The probe directs a beam of low-coherence light at the measured surface, collects the light signal reflected back from the surface, and sends this signal back to the system interferometer via an optical fiber. This fiber can be several meters long.
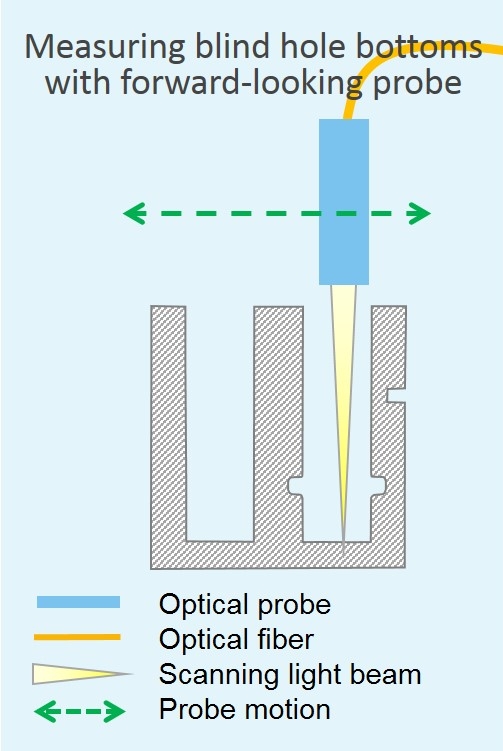
Roughness measurement on bottoms of narrow channels or blind holes
When equipped with a forward-looking probe, NOVACAM OPTICAL 3D PROFILOMETER systems measure roughness on surfaces that include bottoms of narrow grooves (channels, slots) or blind bore holes. These surfaces are notoriously difficult to scan with touch probes, optical systems that rely on triangulation, or with microscopes.
Since the system probes scan in a collinear manner (the outgoing and reflected beam travel along the same axis), they provide much better measurement coverage of bottom corners of high-aspect-ratio features such as steep-walled grooves.
Depending on the probe, standoff distance varies from 0.5 mm to 100 mm for standard probes and can be up to 1 m for non-standard probes.
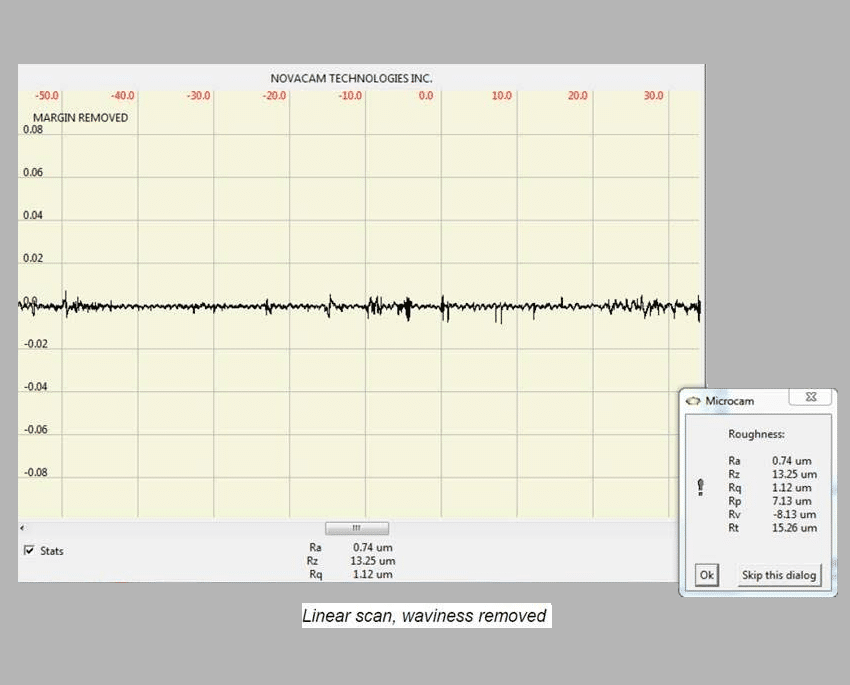
Roughness calculated from acquired linear profile
Measurements are acquired in a point-by-point manner at the rate of up to 100,000 3D point measurements per second, easily providing the point density required for calculating 2D roughness parameters such as average roughness (Ra), maximum valley depth (Rv), maximum peak height (Rp), maximum height (distance from highest peak to lowest valley)(Rt), root mean square roughness (Rq), skewness (Rsk) and kurtosis (Rku).
For the finest roughnesses, 2,100 3D point measurements per second is typically the preferred speed.
The system offers excellent roughness measurement capabilities:
- Finest measurable roughness as low as 0.05 μm (2.0 μin). This limit depends on the probe selected for a particular application.
- Ability to also measure roughness above 10 μm (390 μin) Ra to meet the needs of applications such as additive manufacturing.
Modular fiber-based system design
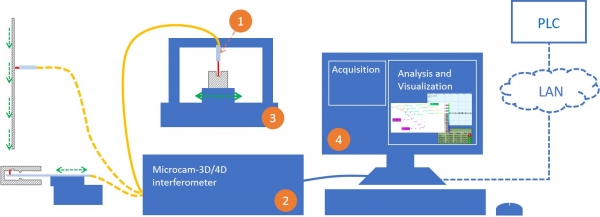
NOVACAM OPTICAL 3D PROFILOMETER system is a modular and fiber-based system: the measuring probe is connected with an optical fiber to the system interferometer (MICROCAM-3D or -4D), which provides the light source and also processes the returned optical signal into 3-dimensional topographical measurements.
Inspection may be fully automated and integrated with a PLC (programmable logic controller).
Easy automation of roughness measurements
The design of the OPTICAL 3D PROFILOMETER system fully supports measurement automation.
- Probes are available in a range of lengths and sizes to measure ID roughness of parts as diverse as engine cylinders, actuators, orthopedic implants, bottoms of blind bores, and high-precision drilled rivet holes.
- Probes are easily integrated with robots as well as any application-specific benchtop or inline motion mechanism.
- Probes can operate next to the measured surface while remaining connected to the system’s signal processing detector (MICROCAM-3D/4D interferometer) via a flexible optical fiber. The fiber can be several meters long.
- Defining scan sequences is quick and easy with the use of a joystick and with optional setting of parameters in NOVACAM data acquisition software. Measurement recipes for various types of components are easily defined and then recalled with the press of a button or selected from a list.
- Scan definitions may also be invoked automatically by a PLC (programmable logic controller). In this way, the inspection cycle and the measurements obtained are independent of the operator.
- Scan sequence can comprise multiple bores (or tubes, etc).
- The systems offer capabilities such as automated pass/fail reporting and exportable reports.
- Optical switches are available for multiplexing more than 1 probe to a single MICROCAM interferometer. Multiplexed probes may be used one at a time. This option brings additional return on investment (ROI) to many installations.
- An application programming interface (API) is available for system integrators and OEMs to accommodate a wide variety of online and offline applications. Exported results may be integrated with data loggers and SPC software.
Additional benefits
In addition to roughness measurement, NOVACAM OPTICAL 3D PROFILOMETER systems offer:
- Ability to measure dimensional parameters (e.g., length of features, step height/depth, angles, etc.), material thickness (in the case of transparent or semi-transparent material), and/or defects with the same probe as is used for roughness
- Ability to acquire a long profile
- Ability to perform in hostile environments, including extreme temperatures or pressures, or radioactive environments
- Measurement with no detrimental effect on the measured surfaces (this is not the case with contact styluses)
- Non-contact probes that do not wear out – no need to buy expensive consumables such as touch probe styluses.
Circumferential roughness
In addition to providing a solution to measuring ID linear (or axial) roughness, Novacam also provides solutions for measuring ID circumferential roughness in hard to reach spaces.
Learn more
Do you need to measure roughness (and/or dimensions, thickness, or defects) in hard-to-reach spaces?


