3D Countersink Measurement – Non-contact & Automated
Published on May 19, 2021
Trend to automate and robotize fastening processes, including countersinking
In aircraft assembly plants, robotic-drill-and-fill systems are increasingly taking over the tasks of drilling, countersinking, and fastener installation. To achieve high precision and consistency of the drill-and-fill operation, assembly plants are incorporating in-process measurements throughout this multi-step process.
This article concentrates on in-process countersink measurements provided by NOVACAM non-contact 3D measurement systems. Their in-process integration capabilities are also discussed.
Which countersink measurements are critical?
Precision countersinking involves paying attention to:
- Countersink inside diameter (ID) geometry – e.g., included angle of the countersink, countersink diameter (opening), depth of countersink
- Countersink orientation with respect to drilled panel surface – the countersink axis should be normal to the panel surface
- Countersink alignment with respect to the rivet hole– the two should be aligned (coaxial)
- Defects such as burrs or excessive chatter.
NOVACAM optical probes for 3D countersink measurement
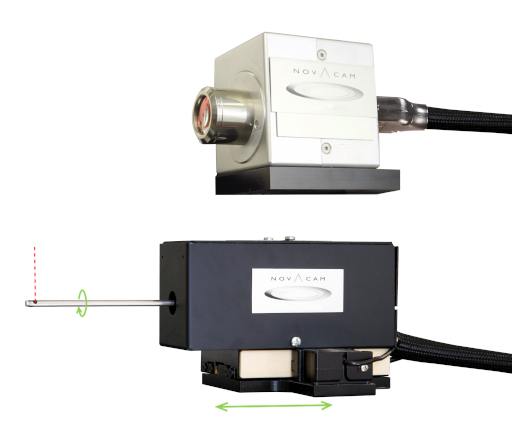
Novacam manufactures three 3D metrology systems that provide assembly plant managers with automated measurements of countersinks. The systems are all based on the same technology, and differ by the type of optical probe(s) they use:
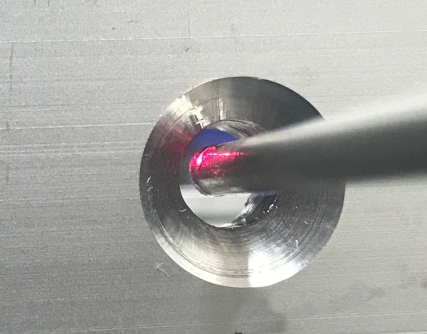
- The BOREINSPECT system uses a small-diameter rotational scanning (RS) probe to enter inside each rivet hole to scan both the rivet hole and the countersink. Scan profiles can be linear, circular or spiral, or any combination thereof. Cycle time will depend on the user-selected scan profiles.
- The SURFACEINSPECT system uses a galvo scanning (GS) probe to scan the countersink area from above in a raster manner. For applications where only the countersink needs to be measured and not the rivet hole, the GS probe provides the shortest countersink acquisition cycle time, at 1 or 2 seconds. The same probe can be used to measure the flushness of the rivet head post-installation. The GS probe is able to measure countersinks from standoff distances of up to 100-400mm.
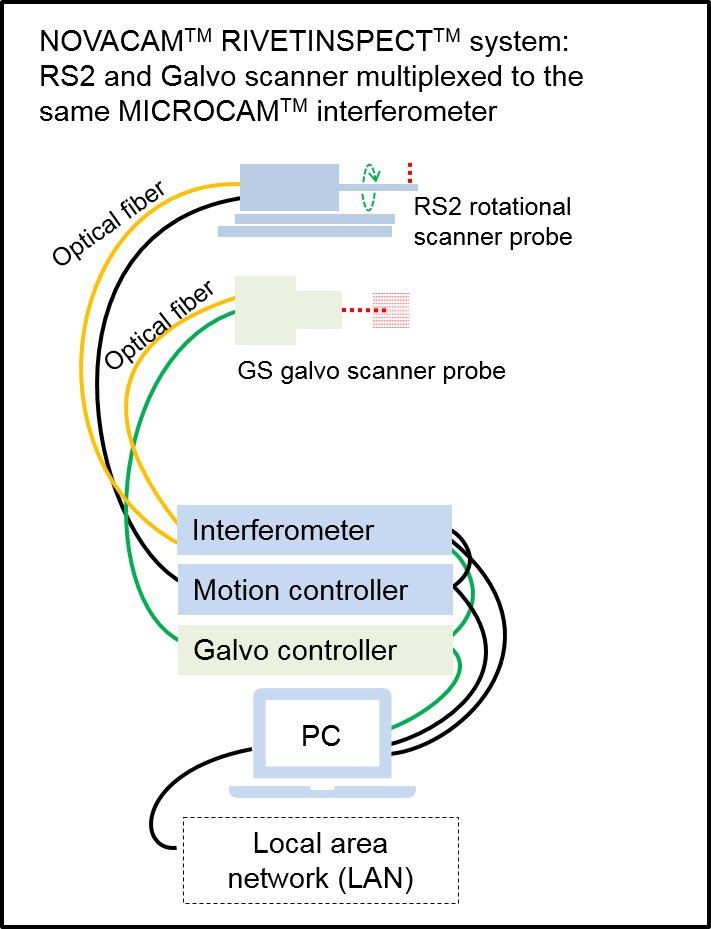
- The RIVETINSPECT system comprises both the RS probe and the GS probe, which are used in alternation. The RS probe measures the rivet hole ID, and the GS probe measures the countersink and the rivet head flushness.
The RS and GS probes are small and fiber-based and therefore easily integrated with a robot head as measurement end-effectors. The probes acquire 3D point clouds by scanning surfaces in a point-by-point manner at up to 100,000 3D point measurements per second. The acquired 3D point cloud is analyzed with industry standard GD&T software, InnovMetric PolyWorks® Inspector.
Examples of 3D countersink measurements
Below are a few examples of 3D countersink measurements available with NOVACAM systems.
In the image gallery below, please
- Click on arrows on the sides of images to move through examples.
- Hover with the mouse on each selected image to read image description.
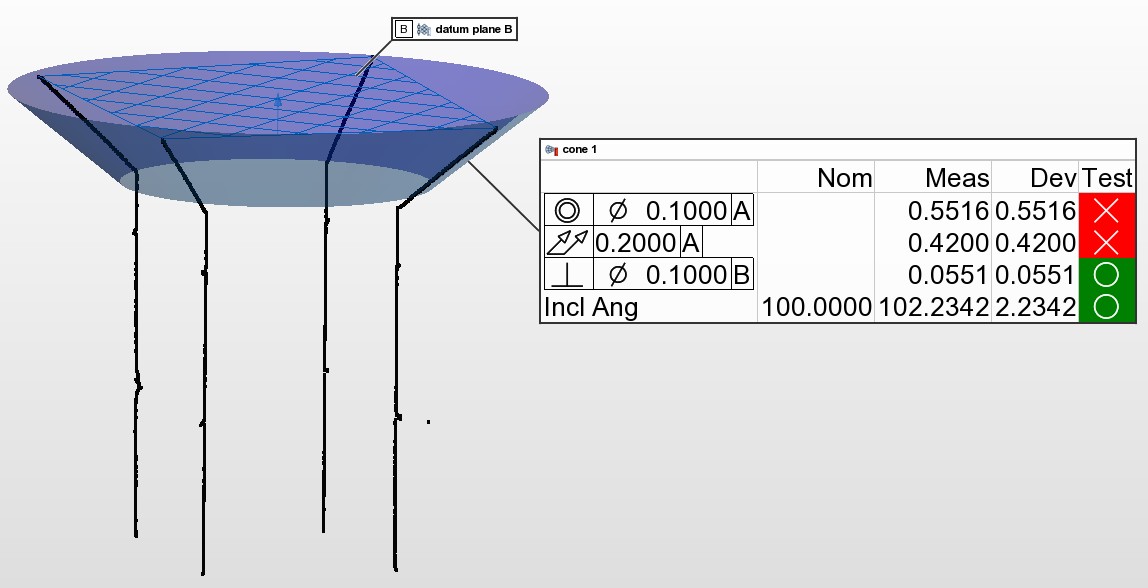
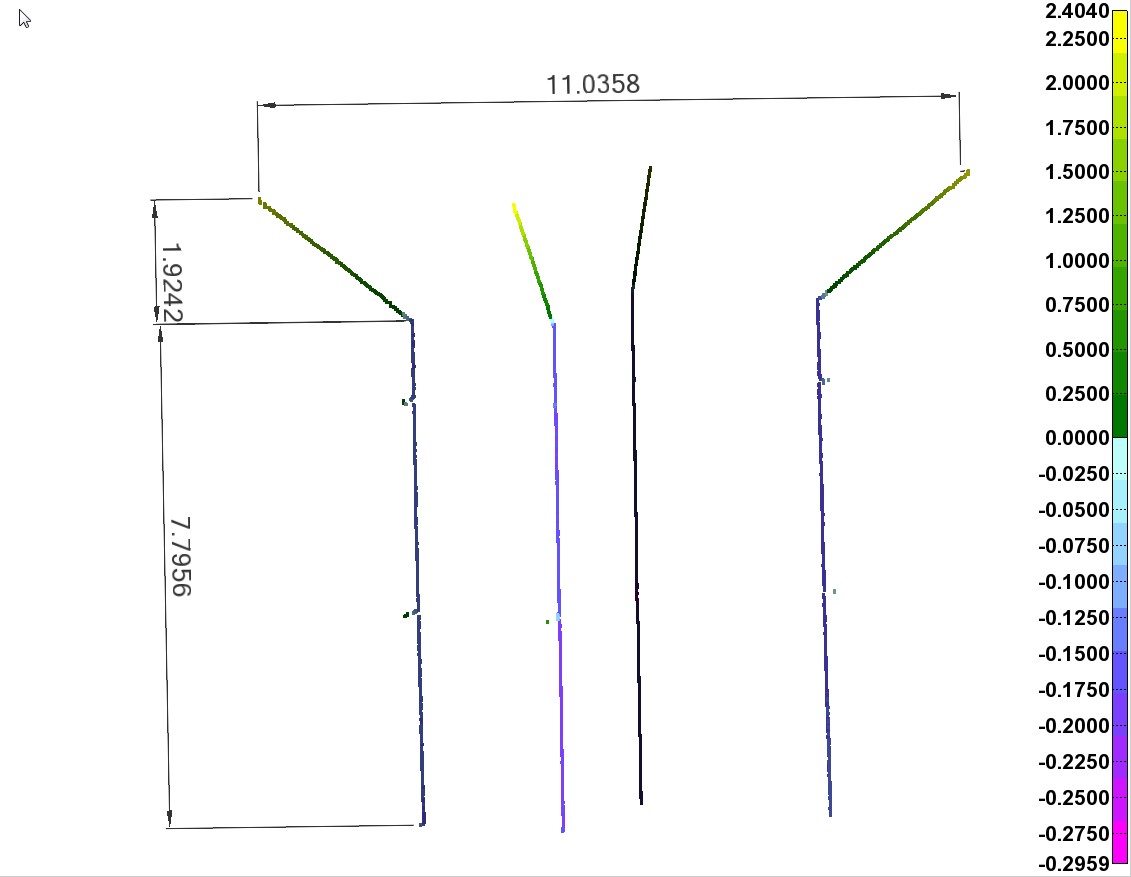
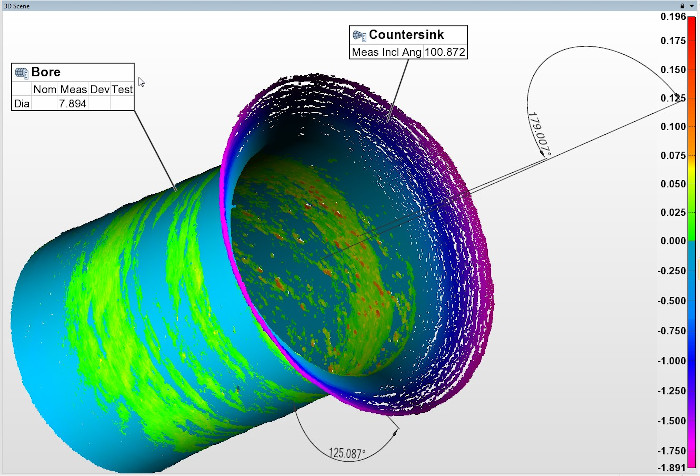
The above images show 3D geometry measurements of:
- Countersink angle
- Depth of countersink
- Depth of rivet hole
- Total stack height
- Countersink total runout
- Countersink diameter (opening)
- Rivet hole diameter
- Perpendicularity of the countersink to the surface plane. (In the example, a besfit plane is used to stand in for the surface plane. The bestfit was based on the first point measured on each profile.)
- Concentricity (coaxiality) of the countersink relative to the rivet hole. The angle between the countersink and rivet hole axes was measured to be 0.993° (180°-179.007°)
- Angle of countersink profile relative to rivet hole profile (125.087°).
Notes on countersink defects
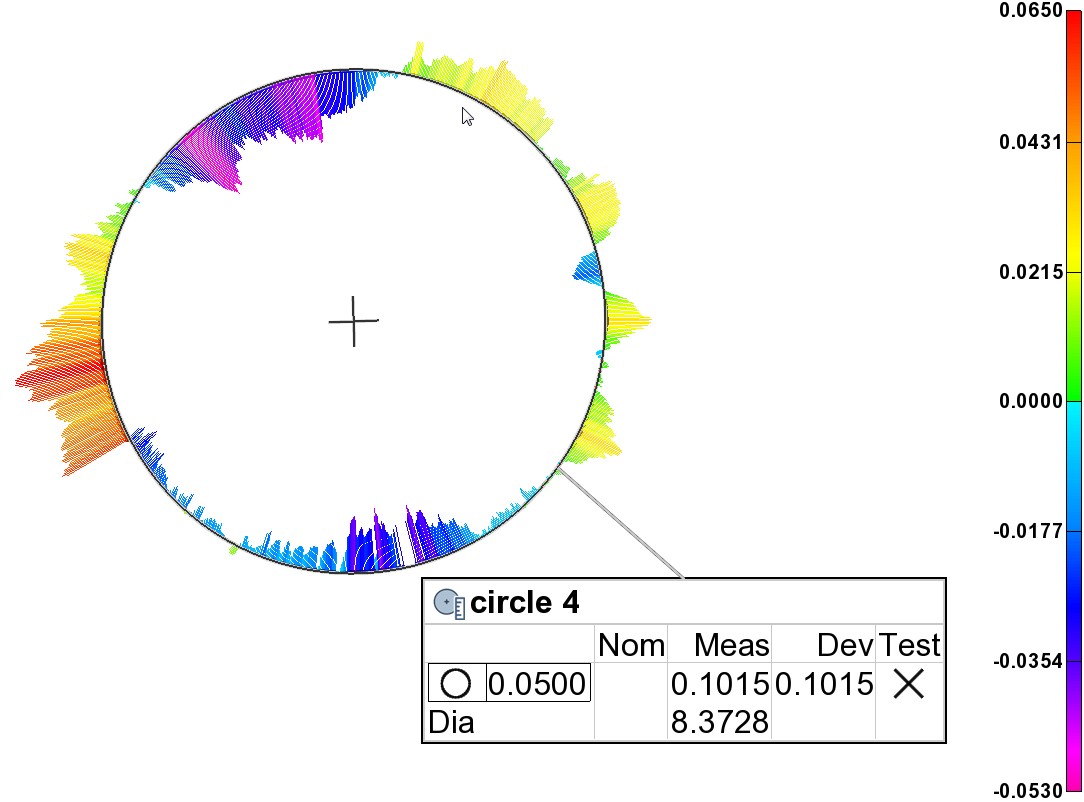
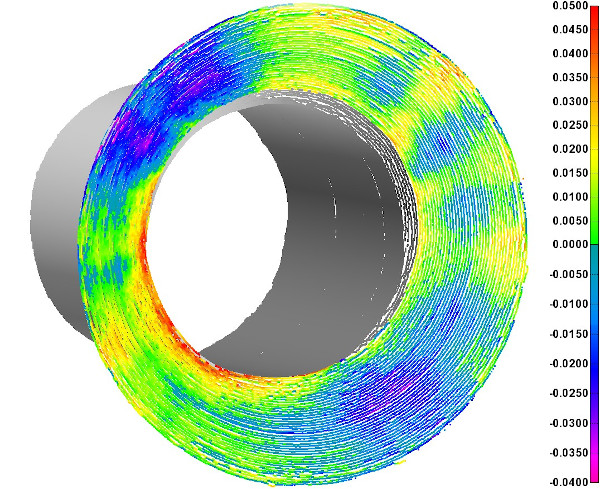
- Chatter is evident on both the circular profile and a high-density spiral scan of the countersink. NOVACAM chatter analysis software is available to automatically analyze and quantify chatter defects from the acquired 3D data.
- Other defects (dents, burrs, etc.) on the countersink are easy to visualize and measure based on the acquired high-precision 3D point cloud.
Notes on rivet head flushness measurement
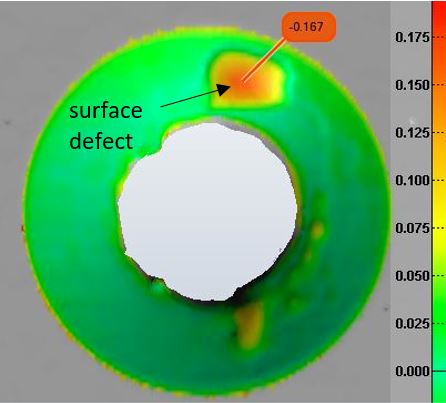
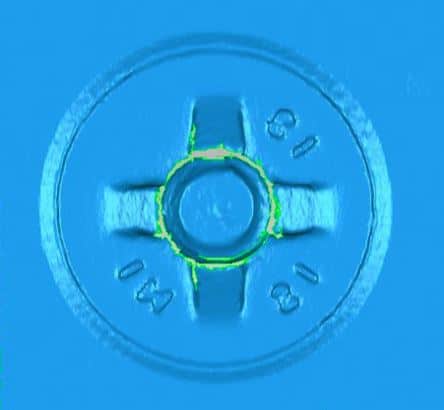
- As shown (in blue image), a post-installation scan of the countersink area provides a good visual check of flushness. The analysis of the flushness of the rivet head compared to the surrounding plane can be fully automated.
Not shown but available bonus measurement – roughness inside rivet holes
- With the above RS probe, QC managers can also measure 2D roughness (Ra >= 32 µm) inside the rivet hole. Read about measuring linear profile roughness, and circumferential ID roughness in hard-to-reach spaces.
Systems suited for 3D measurement automation, robot integration, and plant-floor deployment
NOVACAM 3D metrology systems for drill-and-fill processes are versatile and rugged enough for plant-floor deployment.
- The systems measure with small-footprint scanning optical probes
- The probes can be deployed at a distance from the detector (MICROCAM interferometer), since the two are connected with an optical fiber. The fiber can be several meters long
- The probes are resistant environmental challenges – e.g., they are not affected by ambient lighting or air perturbation
- The probes can measure even in hostile environments that are radioactive, cryogenic, or very hot, in vacuum or evaporation chambers
- User-configurable scan and analysis definitions (recipes) may be invoked automatically through a PLC
- An API is available to accommodate a wide variety of online and offline applications.
- Exported results may be integrated with SPC software
More on automation support with NOVACAM systems is presented in this recent blog article.
To learn more
To learn more on rivet hole and countersink inspection, download a detailed application note “Automated Rivet Hole Inspection and 3D Measurement” [13 pages, PDF, 2.4 MB]
Do you need to automate countersink measurements?
Our application specialists will be happy to discuss the measurement needs of your application.

