How to measure O-ring grooves, blind-hole corners, and undercuts
Published on March 15, 2019
Measuring most features in bore and tube IDs = no problem for Novacam
Measuring inside diameters (IDs) of bores and tubes is something that Novacam 3D metrology systems do every day. The systems use non-contact side-looking probes to acquire IDs as small as 1 mm. The probes scan ID surfaces in linear, circular, or spiral fashion, in a point-by-point manner, at a rate of up to 100,000 3D point measurements per second. In this way, the systems (BoreInspect or TubeInspect) measure inside-diameter dimensions (GD&T parameters), roughness, chatter, or defects.
However there are harder cases
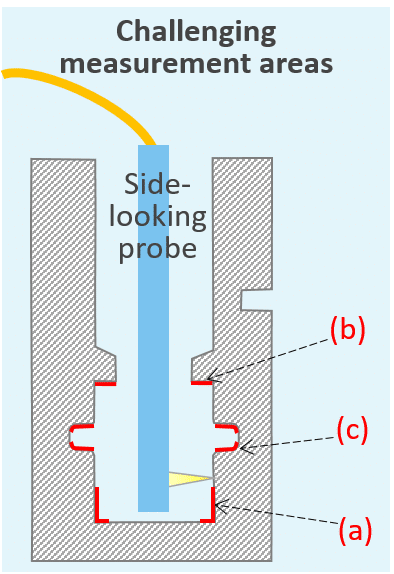
Today’s blog presents a solution for cases where the beam from Novacam standard side-looking probes can’t quite reach the surface of interest. As shown in the diagram below, these cases include (a) blind hole corners, (b) undercuts and (c) O-ring grooves.
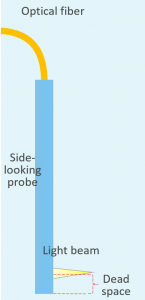
In the case of blind hole corners (a), the “dead space” of the probe limits the light beam from being directed at the bottom corner area. Dead space is the distance between the center of the light beam to the probe tip, as shown in the diagram below.
In the case of undercuts (b), if the undercut walls are parallel to the scanning light beam, the beam will obviously not hit the surface, and so will not measure it. If the undercut wall is very steep, the light beam may hit the surface but not enough light may be reflected back for certain demanding measurement applications (e.g., roughness or burr measurements).
O-ring grooves (c), also called glands, have vertical or steep walls whose roughness has an impact on the life and sealing performance of the O-ring. Additionally, the radius of curvature of the inside corner needs to be measured to ensure proper O-ring seal functionality. Again, these are challenging measurements for a standard side-looking probe.
Custom option: side-looking probes with oblique beam angles
Responding to the needs of the above applications, Novacam designs and builds custom probes with oblique beam angles. Oblique beam probes feature forward or backward slanted beams that open up new measurement possibilities:
Forward slanted beam
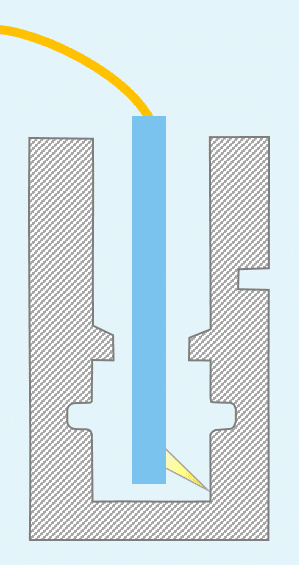
Measure:
- Bottom corners of blind holes
- Bottom walls of O-ring grooves
- Inside radius of curvature of O-ring grooves
Backward slanted beam
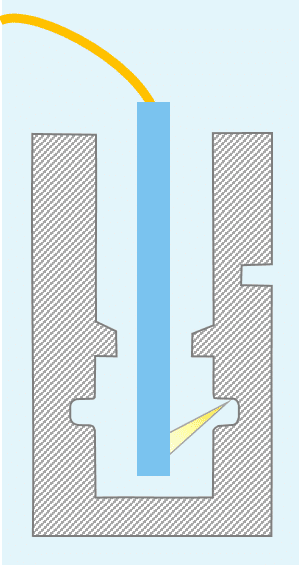
Measure:
- Top walls of undercuts
- Top walls of O-ring grooves
- Inside radius of curvature of O-ring grooves
Backward slanted beam cont.
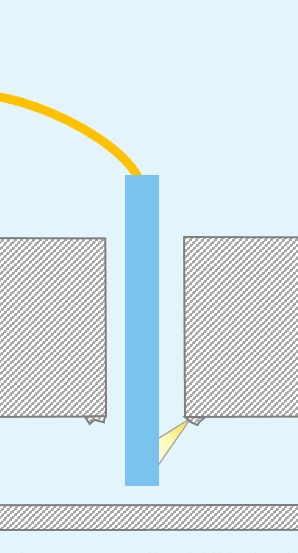
Measure:
- Sharp edges, burrs and other defects created from metalworking (e.g., drilling) in hard-to-reach places. Examples include burs on drilled-through rivet holes in the aerospace industry.
Do you have a metrology application that requires oblique beam probes?

