AUTOMATED 3D METROLOGY on the plant floor
Published on March 19, 2021
In the face of stiff and growing global competition, high-precision sector manufacturers continue to increase automation on production lines – throughout supply chains and across all manufacturing processes, including machining, joining, forming, and casting.
This trend towards automation is also transforming process controls and quality controls. These domains seek automated measurement solutions that are versatile to integrate in the production line, fast enough to keep up with production, and rugged enough to function right on the plant floor.
Proven benefits for automated non-contact 3D measurements
To help manufacturers achieve these capabilities, NOVACAM 3D metrology systems are designed with speed, precision, and versatility in mind. Based on low-coherence interferometry, the systems have provided automated 3D industrial measurements for labs and plant floors for over 20 years and across sectors, including in Aerospace, Automotive, Defense, Energy, Electronics, Glass, Medical Instrumentation, Oil and Gas, and Semiconductors.
Clients are able to achieve:
- 100% (or at least high percentage) inspection
- Rich data collection to support lean manufacture
- Tracking and adjustment of processes prior to failure
- Tracking of tool performance to optimize replacement of expensive process consumables
- Automated production of value-adding QC reports for manufactured units
- Minimization of losses and costly stoppages

Example of automated high-precision inspection on the shop floor: Automated shaft ID measurements with NOVACAM BOREINSPECT system integrated with Universal robot UR5 equipped with a Robotiq Gripper
Watch a video of the above application here.
Speed and measurement capabilities
NOVACAM 3D metrology system product line offers:
- Non-contact micron-precision 3D geometry (GD&T parameter) measurements
- Measurements even inside hard-to-reach spaces such as bore IDs
- High acquisition speed of up to 100,000 3D point measurements/second
- Measurements of high-aspect-ratio features such as undercuts, steps, channels, cross-holes, splines, threads, or O-ring grooves
- Ability to also measure chatter, roughness, defects, or semi-transparent material thickness with the same probe
- Option of acquiring long profiles to accommodate measurements on production webs.
Choice of optical probes
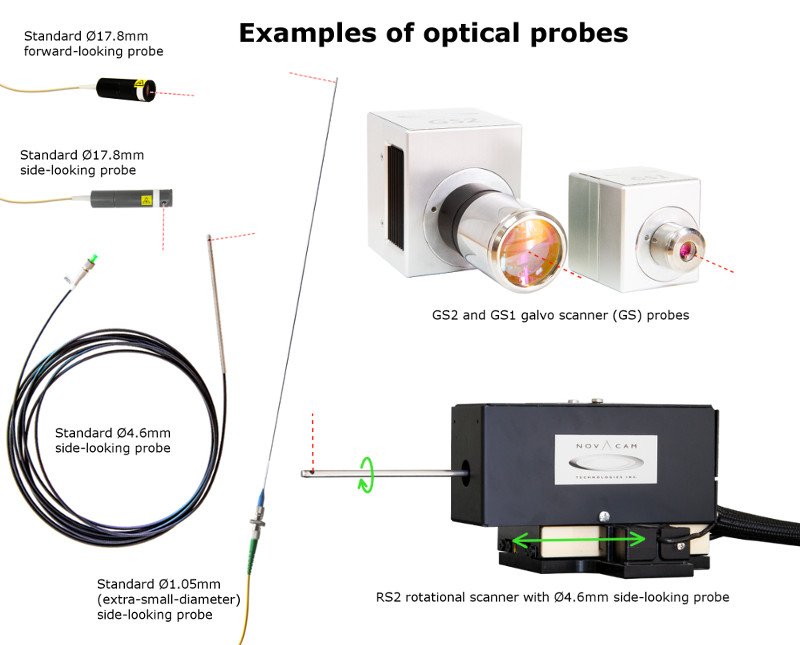
To suit a wide variety of measurement needs and application environments, Novacam offers several designs of non-contact scanning probes:
- Small-diameter optical profilometer probes that enter small bores and crevices to measure profiles inside IDs as small as 1mm in diameter.
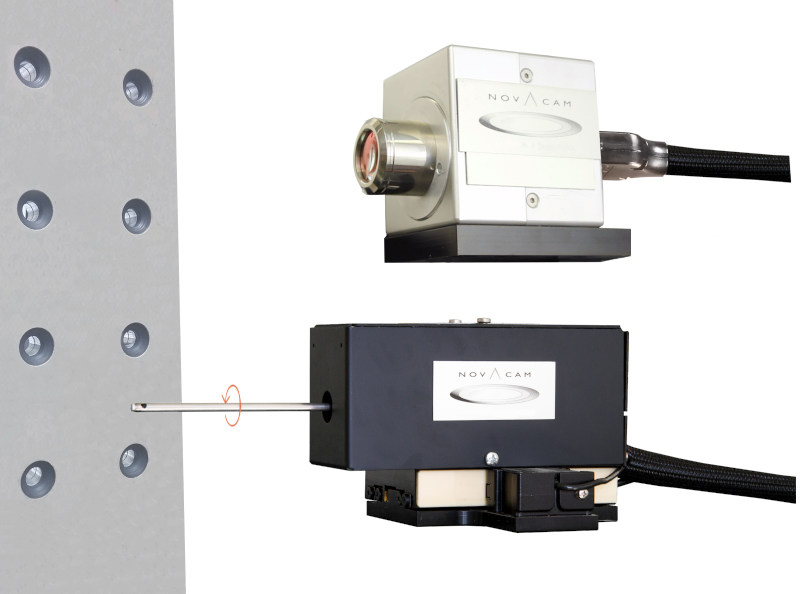
- Small-diameter rotational scanner probes that enter small spaces to measure 3D geometry inside such spaces – parameters such as diameter, straightness, angles, concentricity, cylindricity
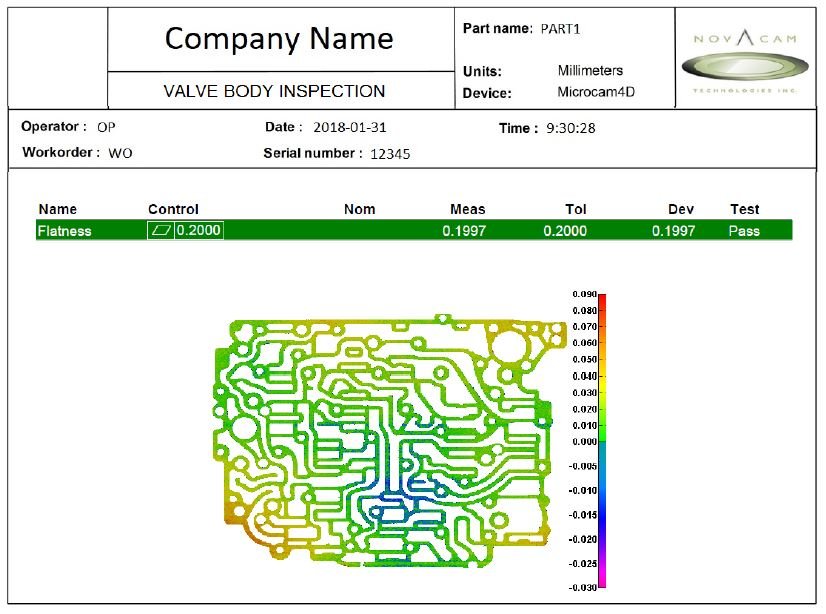
- Galvo scanner probes that acquire surfaces in a raster pattern to enable efficient area and strip scanning. Surface flatness and edge radius measurements are example applications.
Versatility thanks to modular and fiber-based system design
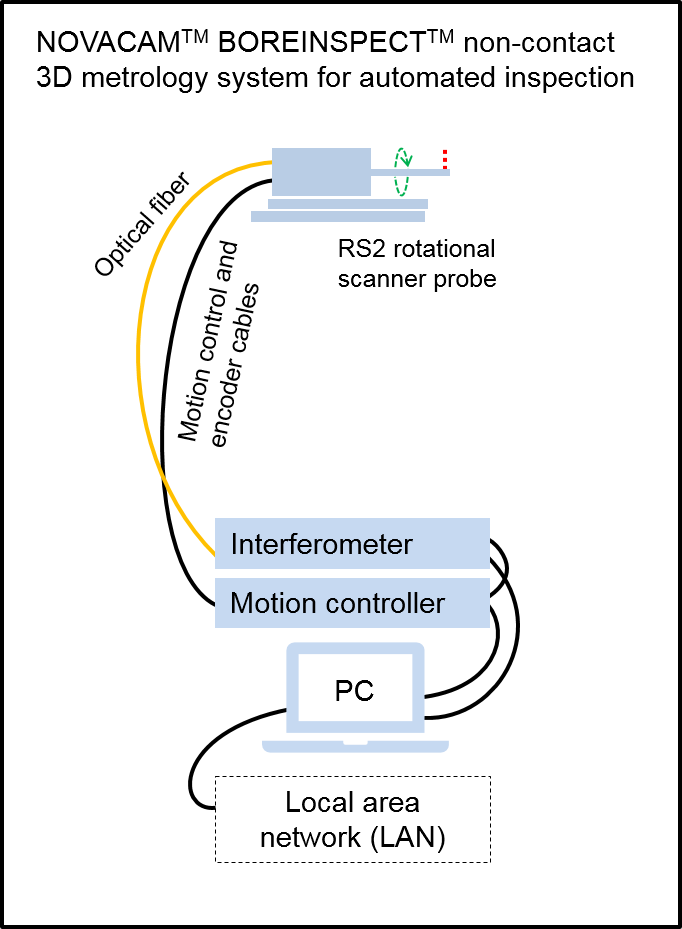
NOVACAM 3D metrology systems are based on low-coherence interferometry technology. They comprise:
- An interferometer (MICROCAM-3D or -4D) which produces and processes light signals
- Small-footprint scanning optical probes, which can be deployed at a distance from the MICROCAM, since the two are connected with an optical fiber that can be several meters long.
The system modular and fiber-based design allows the optical probes to be installed wherever required in the process—on precision stages, robot heads, gantrys, or CNCs —while the interferometer (a 4U 19-inch rackable unit) may be located several meters away, such as on the base of a robot.
Immunity to important environmental factors
Novacam systems are notably resistant to environmental challenges:
- They are not affected by ambient lighting, air perturbation, or cutting of the beam
- The probes can measure even in hostile environments that are radioactive, cryogenic, or very hot, in vacuum or evaporation chambers
- The probes can measure through glass or sapphire windows, at standoff distance of up to 1 m, and in water.
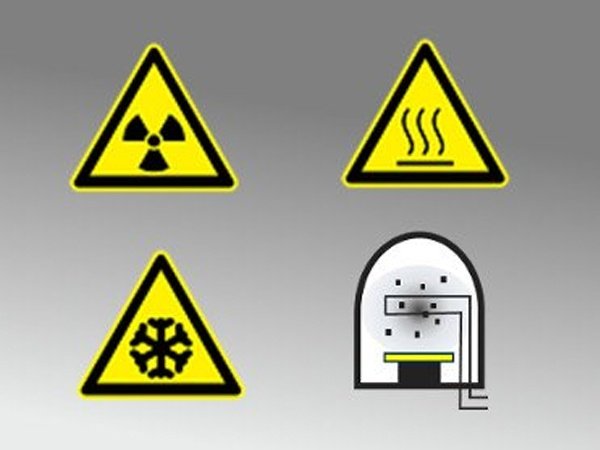
NOVACAM systems are capable of measuring inside hostile environments, such as radioactive, extremely hot, or cryogenic, or inside evaporation chambers
Material agnostic – even reflective, semi-transparent, shiny or matte surfaces
The systems measure a wide range of materials including ones that are reflective, transparent, semi-transparent, specular, or nonspecular. Dull or shiny surfaces may be measured regardless of color or material. No powder coating is necessary to obtain reliable scan data.
Software support for automation
The acquired 3D point cloud analysis may be fully interactive or fully automated. NOVACAM data acquisition software allows users to automate the full rivet measurement cycle, including scanning, data analysis, and subsequent reporting.
- User-configurable scan definitions, comprising measurement, data analysis and reporting, can be named and saved for later recall. They may be invoked automatically through a PLC (programmable logic controller) or interactively by an operator with the push of a button.
- An application programming interface (API) is available for system integrators and OEMs to accommodate a wide variety of online and offline applications. Exported results may be integrated with data loggers and SPC software.
Examples of automated 3D metrology applications
- Aerospace: valves, cylinders, manifolds; drilled rivet holes at aircraft fuselage assembly, fir tree slots, airfoils, vanes, turbine blades
- Automotive: valve body bores, valve seats, cylinder bores, cylinder heads, hollow shafts (e.g., automatic transmission clutch shafts), fuel injector nozzles, actuators
- Defense: bores, barrels, scopes
- Electronics: glass flatness, glass edges
- Industrial gas turbine engines: compressor and turbine airfoils and vanes, vane rings, duct or nozzle throats, shafts
- Medical equipment and devices: IDs of orthopedic implant
- Superconductors: CMP pad surfaces, wafer edges
Where can I learn more about the systems and their measurements?
- Read more about NOVACAM product line
- Visit our application pages on GD&T parameter measurement, roughness measurement, chatter measurements
Let us help you with automating 3D metrology in your application!


