Automated bore ID chatter measurement video
Published on August 15, 2018
A US-based integrator, Arnold Gauge, was recently contracted by an automobile parts manufacturer to develop a temporary bore ID chatter gauge. The gauge was to measure inside-diameter (ID) chatter in thousands of turbo shaft over several weeks while an intermittently problematic manufacture line was undergoing troubleshooting.

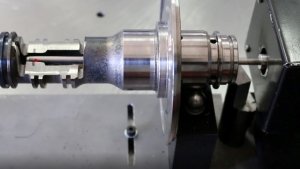
Non-contact chatter measurement on the inside of a turbo shaft
Chatter is a type of defect that can seriously affect the functionality, efficacy, and longevity of machine parts such as turbo shafts. When parts have chatter, they create noise and wear prematurely, often resulting in failure and recalls.
Chatter waves (or lobes) are typically created by vibrations between a machining tool a part during manufacture or finishing. They can be hard to measure, particularly in a non-contact manner, and especially when inside a tube or bore.
For the measurement component of the gauge, Arnold Gauge turned to Novacam, knowing that Novacam’s 3D measurement systems meet the challenge of automatically measuring interiors of bores and tubes – in a non-contact manner and with micron precision.
The gauge constructed combined:
- Novacam BoreInspect system (comprising the RS2 rotational scanner and Microcam-3D interferometer) for measurement
- Universal robot UR5 and Robotiq gripper for part loading and sorting
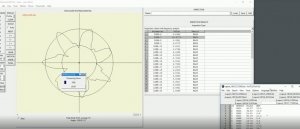
- Novacam Chatter Analysis Software to analyze measurement data and categorize parts as PASS or FAIL as per user criteria.

The gauge was ready for production in 2 weeks. With it, bore ID measurement and chatter analysis of over 16,000 turbo shafts were fully automated. About 35% of turbo shafts were diagnosed as outside acceptable limits and therefore scrapped, while 65% were found to be within specifications and could be reliably used in the next step of the engine manufacture process.
Achievements for the integrator’s client were significant:
- 45 second inspection cycle time was achieved (of which 5.5 seconds was the time required for a 2-rotation ID acquisition by RS2)
- 16,000 possibly defective parts were measured and sorted
- 65% of parts passed the measurement test and were thereby salvaged from the faulty manufacture line.
Major benefit:
- Downtime of major automotive production line was avoided.
See how this gauge works:
Do you need to measure chatter?
