Blade and blisk inspection and 3D metrology
Measuring Systems: NOVACAMTM BOREINSPECTTM and EDGEINSPECTTM systems
Keywords: aerospace, energy, compressor blades, stators, airfoils, bladed disks, IBRs (integrally bladed rotors), NGVs(nozzle guide vanes), diffusers, cooling holes
Measuring blade surfaces
Turbines, both in aviation and energy sector, include high-speed rotating parts that are subjected to exceptional impacts of heat, pressure, and forces. Since the geometry and surface finish of turbine blades are critical to engine operational efficiency, blade manufacturers must strictly control spec tolerances. Also, once in service, blades are regularly inspected for defects and reconditioned.
Watch how BoreInspect 3D metrology system measures turbine blades with precision, and in a non-contact fully-automated manner. The small-diameter non-contact scanner probe easily enters between the closely-spaced airfoil blades.
Cooling holes and seal slots
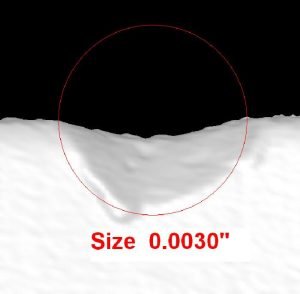
Cooling holes are minute holes drilled into the surfaces of some turbine blades to provide film cooling of the blade. The cooling holes present a sudden and sharp edge in the scanned surface and are problematic for many 3D measurement technologies.
Seal slots are also hard-to-scan features. They are machined on turbine blades that are manufactured separately from the rotor. As the blades are joined onto the rotor, the seal slots are filled with metal plates. Like cooling holes, the seal slots are often machined using EDM.
Watch how measurement of cooling holes and seal slots on a stator blade is achieved as part of a fully automated inspection by BoreInspect.
Read more on measurement of cooling holes and measurement of EDM seal slots.
Measuring blisk surfaces
A blisk (also known as an integrally bladed rotor, IBR) is an engine compressor component comprised of a rotor disc and blades. A blisk can be machined from a solid piece of material or made by welding individual blades to the rotor disk. Unlike regular blades that can be detached from the rotor disk, the tightly spaced blisk blades cannot be detached for conditioning or measurement purposes.
Addressing this challenge, the non-contact rotational probes of NOVACAMTM BOREINSPECTTM system rotational scanner probe easily reach between blisk blades to acquire high-precision topography measurements of their inner surfaces. A fully automated inspection sequence of all blades on a blisk is available with the BOREINSPECT system working in concert with precision stages or a robot arm.
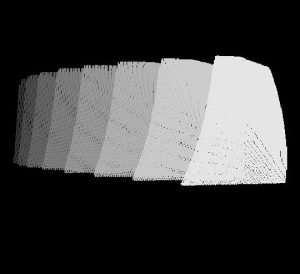
See images of the 3D cloud comprising multiple blisk blades acquired in one automated sequence.
How the measurement is done
NOVACAMTM 3D metrology systems are based on low-coherence interferometry (LCI)
- NOVACAM optical probes scan surfaces in a collinear fashion – the light beam is emitted and received along an identical axis – and therefore sharp edges of cooling holes or other high-aspect ratio features do not present a problem. The size and incident angle of the minuscule cooling holes can be determined.
- The probes acquire surfaces at up to 100,000 3D point measurements per second, providing a dense point cloud of micron-precision 3D measurements for analysis.
- Using GD&T software (InnovMetric PolyWorks InspectorTM, which comes as an option with NOVACAM systems), the acquired blade surface data may be compared to CAD drawings for defect detection.
- Exported results may also be integrated with data loggers and SPC software.
Versatile blade and blisk inspection solutions
NOVACAM 3D metrology systems can be adapted to all blade inspection needs, and provide capabilities from simple GD&T verification to defect detection and measurement.
- To measure the hard-to-reach blade or blisk surfaces, solutions will typically involve the BOREINSPECT system, which measures with a small-diameter rotational probe
- For edges and open surfaces on blades, solutions may involve the EDGEINSPECT system, which measures with a galvo (raster) scanner
- To combine several types of measurement in one system, a custom system is configured with 2 or more probes (e.g. galvo scanner and a rotational probe) all connected to one interferometer, bringing additional return on investment (ROI) to Novacam’s aviation and energy sector clients.
Advantage of scanning with fiber-based probes
NOVACAM systems are based on low-coherence interferometry (LCI) and are highly suitable for automated inspection applications. Our probes and scanners come in a range of sizes and designs to suit each particular application.
The probes and scanners are fiber-based and therefore they:
- Deploy at a distance from the detector, without signal degradation
- Are easily deployed either as robot end-effectors or as components in lab inspection stations with multi-axis displacement
- Can be made rugged to operate even in hostile environments (radioactive, very hot, or cryogenic)
- Allow for flexible in-process set-up. See more advantages of our fiber-based LCI systems.
Related links
Watch related videos:
See related applications:
See related products:
Contact us or request free sample analysis to see if NOVACAM 3D metrology systems are suitable for your blade measurement application


